The Gallerist Review Game5
It’s also one of the hardest types of game to review because it’s mechanics are so interwoven that as soon as you begin discussing one element you find yourself needing to explain something else as well. The result is a rambling review that bounces wildly back and forth between various parts of the game, confusing the reader as they try to keep track of just what the hell the author is rambling about now. It’s far cry from the wonderfully laid out rulebook which carefully guides you through every possible option in a logical progression. See, what The Gallerist does so well is take its complexity and makes it surprisingly easy to learn. If art is the goal of trying to communicate something complex and difficult to grasp in a simple and effective manner, then the Gallerist truly is art within its own right. At most on your turn you can move your single pawn to one of four locations, each of which has two actions associated with it. There are a handful of other mechanics added in to consider as well. All of these individual actions are easy enough to learn, but as the game progresses these various actions begin forming a complex chain of strategy where each move must be carefully thought out. The moves are limited, but consequences of each are huge. It’s a sublime example of game design, an elegant lesson in how to create a compelling experience. With all of this in mind I’m not going to attempt to explain every little detail; it doesn’t need it, and for the sake of a written review it would be a crazy exercise in futility. There’s a couple of great videos on Youtube outlining how the game plays, and I encourage you to check them out.
Lying at the heart of the game is the intriguing kicked out mechanic. The Gallerist is essentially a worker-placement game at its core, which is to say on your turn you take your single worker and choose one of the four locations to place it on the board. In most instances of this genre once a space is taken by a place nobody else can take that action, but in the Gallerist it’s possible to kick an opponent out of a spot. As a result, however, that person can use their influence ( more on that very next paragraph) to take an action in that location, essentially giving them a bonus turn that takes place after the active player has finished up. If that wasn’t enough when a player moves they can leave a spare assistant behind who’ll also grant a kicked-out action if moved from that location, too. In a two-player game things can become quite crowded as assistants are left at locations and judging whether to give someone the option of a kicked out action is important, but with the full contingent of four players vying for dominance being kicked out becomes an integral part of the game. To take the bonus action a player needs to drop down to the next Fame marker on their influence track, a maximum of five points. However, if they’re only a single point away from a Fame marker they only need to take a hit of a single influence point. Sometimes it’s worth risking giving someone the possibility of an extra move if they’re going to have to spend a lot of influence to take. It’s a highly ingenious mechanic that adds another layer of strategy to a game already brimming with it.
So, what about that influence, thing? Influence is exactly what it sounds like; a measure of your personal clout within the art world. In the Gallerist this influence acts as a currency of sorts that can be gained and spent throughout the course of the game, influencing (heh.) many different mechanics to become an important resource that must be managed at all times. We’ve already covered how you can spend influence to grab a bonus turn, but you can also use it to help make artists more famous. That’s not all because you can also use it to gain extra cash whenever you pay for something, essentially using the sway you hold to haggle the price down a bit. By the end of the game your influence converts to bonus money, although not quite enough to make you want to avoid spending it during the game itself. Regaining influence is quite tricky, so you do want to pick and choose what you spend it on and when. Those who manage their influence and leverage it wisely tend to quickly gain a decisive advantage. It’s thematically brilliant.
Read also : 51 st State Review
Then there are assistants. You’ll start the game with two of these guys and can hire more throughout the course of the game. Aside from being dumped at various locations around the board in the hopes of gaining a kicked out action they also play an important part in earning you a variety of bonuses, essentially getting spent either permanently or temporarily to do certain things.
The final core mechanic that we need to tackle is visitors, the people who will be lured into your gallery by spending tickets which you’ll earn in various ways. These visitors come in three forms; the brown meeples represent investors, while the pink meeples are VIPs and white meeples are collectors. It’s important to have visitors within the two areas of your gallery for various reasons, but the primary one is because they tie into various bonuses. Investors tend to result in extra cash, while VIPs will help boost your influence and collectors help make artists more famous. Potential visitors get placed into the central plaza on the board where they can then be moved into your lobby using a ticket, and then into the gallery proper using another one. It is these visitors who will purchase the works of art hanging in your gallery, and that your assistants will chat to about your reputation and potentially bidding on world famous pieces.
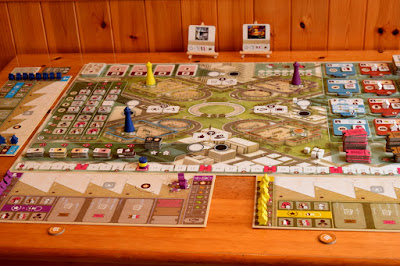
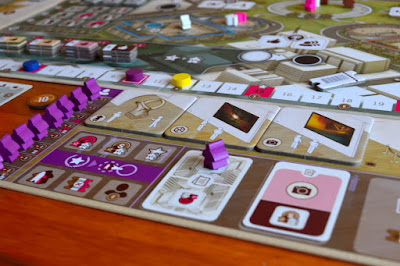
With these basic ideas covered, you’ll be given a playerboard. This represents the inside of your gallery and has spaces for up to four pieces of art to be displayed at any given time, along with slots for tickets, reputation tiles, contracts and areas for your assistants.
To win the Gallerist you need to be holding the most money at the end of the final turn. However, there’s a lot of ways to earn that money. At the start you’ll be given two random cards, one of which grants bonus money for sets of art you sell, and another which gives money for having sets of art currently on display in your gallery. You’ll also net some bonus moolah for influence, the amount of assistants you’ve sent off to the international market on your behalf and for your reputation tiles, another aspect of the game we’ll get to later on. In short, there are a good number of different ways to net yourself cash and win the game, although it’s fair to say that strategy doesn’t vary too radically. You’re always going to be grabbing art and selling it on for higher prices, for example.
To sell one of your paintings, photographs, sculptures or hunk of 3D art you first need to head up the board and acquire a contract. Interestingly getting a contract and taking a sell action both use the same spot, and thus without using a kicked out action you can’t get a contract and sell of a piece of work in the same turn. With a contract in hand there’s three places to put in on your board, each of which earns you a different ticket for attracting new visitors, although you only gain that bonus for the first card put in each slot. Subsequent cards are simply placed on top of old ones. These contracts each have a little icon at the bottom which shows a bonus you can acquire provided you’re willing to place an assistant on it as an Executive Action. Executive actions can be taken before or after the main part of your turn, and break down to either placing an assistant somewhere or spending tickets. These bonuses are essential you sending an assistant to butter up whomever the contract is from, and therefore it’s a nice thematic touch. You could, for example, earn influence based on how many collectors and VIPs are sitting in your gallery, or you may even be able to snag a free assistant. Once you’ve sold a piece you obviously remove it from your gallery and set it aside, before then taking one visitor (if you have any) from your gallery, representing the purchaser, and placing them back in the plaza. Then you flip the contract card over to reveal a further two bonus icons, and orientate it based on the visitor color you removed. Again, by using an assistant (if one was on the previous bonus its return when you flip the contract) you can grab this bonus. Still with me? No? Bloody hell, keep up.
The actual amount of cash you earn for selling a work of art is based upon that fame meter we briefly talked about earlier. While the amount you must pay to buy a piece is indicated purely by the number that the fame marker is currently sitting on, the sale value is determined by the star value of the artist. Along the track there are stars and when the marker passes these any works of art by that person become worth that amount. Three green stars, for example, mean a piece is worth $11. What this means is that if you time it right the simple act of buying a piece of art can send the marker over the next star rating, so you might buy a piece for $8, increase the fame value because it’s an impressive piece and you have a few collectors in your gallery and pass the next star threshold, giving it a sale value of $11. Immediate profit.
Before you sell a piece to some crazed collector waving his wallet in your face it might be an idea to pay a visit to the media centre and consider using your influence to promote the artist in question, increasing his fame and hopefully bumping up the sale value some more. To do this you first need to look a little Facebook-style thumbs up icon on the artists tile that indicates their current media value up to a maximum of five, which indicates celebrity status which comes with its own benefits. To increase an artist’s fame you have to spend influence equal to the next level of the Facebook icon needed as shown on the track, thus if an artist currently has a level of two then you’ll need to spend three influence to earn the next rank. Each level confers a different bonus so in a way you get rewarded for taking this action (in fact, in most instances there are bonuses for doing things), but most importantly you’ll get to increase the artist’s fame one level, plus more equal to the number of collector’s currently occupying your gallery. You can also boost the fame level further by moving your influence tracker down to the next fame marker, a potentially big hit that could prove very valuable if it helps ramp the sale value up through the roof. Choosing exactly when to promote an artist is important, but you also have to remember that if your opponents owns one of that artist’s pieces then they’ll benefit, too.
Read also : 1up Subscription Box May Review
The media area is where you can also spend some cash to hire new assistants to help spread the love around, in a complete non-sexual way, I swear. Each time you hire a new assistant you’ll earn yet another bonus as displayed on the playerboard, granting you more tickets, boosts to your influence and even money back provided you’ve got the right people chilling in your gallery.
The left location is know as the International Market and is where most of the socializing and hobnobbing is handled, or more specifically where you send your assistants to do those things in your stead. Unlike the rest of the board, however, there are some requirements to performing actions here. Both sections are broken into three columns, and to be able to access any of them you need to have the correspondingly colored visitors sitting in the lobby if your gallery, enjoying refreshments and some light conversation. The first action you can take is to gain a reputation tile from the top section, which is broken down further into four rows, each one accessible only if you’ve sold at least one of the matching art types. Reputation tiles are bonuses that get calculated at the end of the game, earning you influence and money based on a variety of things. You might, for example, snag a tile that gets you extra money for every work of art sold, or another that grants influence and cash for specific types of visitors who are occupying your gallery. Another still may give you a bonus for every photograph you acquire throughout the game. On your playerboard there’s room for six tiles, with each slot granting a bonus as soon as a tile is placed upon it. This is where most of the long-term strategic planning comes from in The Gallerist. A couple of well-selected tiles and a great plan can earn you a windfall at the end of the game, so picking out the right tiles for you is important. Typically its best to match these up with the cards you were given at the start of the game, that way if you need to sell two photographs you can potentially earn a bit extra for doing just that.
The second section is the International Auction where you can place bids to win a renowned work of art at the end of the game that has a value equal to best known artist of the corresponding type. It’ll also count toward your Curator or sales cards, too. Like gaining a reputation tile to place a bid you have to leave one of your assistants in the available spaces and then pay the indicated amount of cash in order to place. Whomever has bid the most at the end will earn the art in question. If more than two people are playing the game then more works of renown are displayed, thus whoever has the second highest amount of bids receives the next piece and so on.
Arguably none of these actions carry the same sense of satisfaction as taking the action to discover a new artist, done over at the Artist’s Colony section of the board. At the start of the game one of the eight randomly selected artist tiles is flipped face up and is therefore actively creating artwork. By discovering a new artist you get to flip any of the other artists over, thereby claiming the bonus tile sitting atop them and earning a commission. To take a commission you simply grab one of the two available markers from that artist and place it in the allocated slot on your playerboard, where it remains until you decide to purchase the commission from the artist. You can only ever have one commission, but what it does is allow you to purchase a work of art from that person at the lowest price possible, regardless of their current level of fame. Discovering an artist may not make them exclusively yours or provide any further bonuses, but there is a sense of pride to be had from bringing a new creator onto the scene and watching them become famous. With that pride can come pain, though, as inevitably other players will buy pieces from them, promote them and help them become mega stars. There will be a time when you want to promote the artists, only to realise that in doing so you’ll help an opponent, Your sense of ownership over the artist in question makes you want to support them, but business demands you consider it carefully.
Like a masterpiece you can deconstruct every aspect of the Gallerist into its smallest pieces and gain an incredible appreciation for the work that went into creating it. And yet like a masterpiece it’s not until you step back and soak up the piece as a whole that you truly discover its beauty. Through it’s fantastically designed mechanics flows a wonderful game of strategy that also boasts a strong theme. Every turn feels important. While many other games have rounds that feel inconsequential The Gallerist always has something going on that must be carefully considered. Each turn is an opportunity to further your goals in a variety of ways, be it through acquiring new works of art to sell on or grabbing a reputation tile for the end. Perhaps more importantly it’s knowing when to take certain actions that leads to victory.
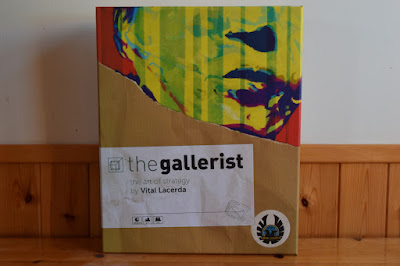
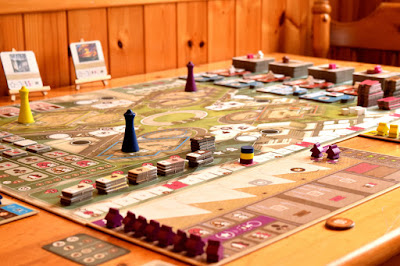
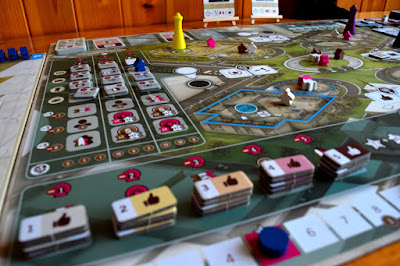
Fittingly the components are nothing short of luxurious, having seemingly been crafted by an artist seeking to make his work the very best it can be. The tickets, works of art and other tokens are are the thickest I’ve ever seen in a boardgame. It’s like they were created by taking the regular tokens out of lesser games and gluing two or even three of them together before cutting out the new shape. They’re chunky and thus feel like quality items. The few cards the game has are made of lovely textured card. Meanwhile the massive wooden player pawns further enhance the feeling of luxury, as do the many meeples. The main board and the player boards are all beautifully made as well. There’s a large cloth bag used for randomly drawing visitors. Finally the game includes wooden easels with which to display any works of art up for auction, which is a truly fantastic touch. The components are flawless, really. I suppose I could perhaps say that the meeples aren’t as well defined as they could perhaps be, but that would be a high degree of nitpicking.
The sense of quality continues into the packaging. The insert has a place for everything and a transparent plastic lid that keeps all the components in their compartments regardless of whether ot not the box gets shaken around. In that plastic lid is a perfect indent for the board itself to sit. Finally everything is held inside a thick box that feels suspiciously like it could double as a shield should the need ever arise.
And of course it’s all utterly beautiful. The game is awash in soft colors, and everything has a place on the board or on the player’s trays. I love how the works of art are double-sided so that you can flip them over and display them in your gallery. I love the little easels. I love the colors. It’s just so damn pretty.
The Gallerist could be put on display in a gallery as a work of art. It would only be fitting given its subject matter. Aside from perhaps grumbling under my breath about how damn long I’d sometimes end up waiting in a four-player game as everybody took their kicked out actions there are no flaws that I can find. It’s deeply thematic across the breadth of its considerable mechanics, and demands that you seriously contemplate every turn you take. The influence track and kicked out actions are ingenius pieces of design that help bring everything together. Speaking of which, the individual mechanics tie together in ways I can’t even begin to properly describe in a written review. Everything feeds into everything else. There are always bonuses to be had that feed other actions. It plays brilliantly with two, three or four players, and there’s even an enjoyable solo mode in case you fancy a few hours of peace and quiet. It simply is beautiful in every respect. A true classic. A masterpiece. A work of art.
Beauty.
Designed by: Vital Lacerda
Published By: Eagle Gryphon Games
Players: 1-4
Read also : Agricola 2016
